Lottie showed us three different ways to create this look, and each technique gives a different finish.
We also created a chingnon with textured hair.
Effortless curls
This is a very common hairstyle; great for festivals, every day wear or even special occasions. Good for adding volume to flat hair.
For this look you will need curling tongs. Make sure you use heat protecting spray before applying heat to the hair.
Take large sections when curling - you want waves, not curls. However, if your model has very fine hair you can do it in smaller sections, then break them apart with your fingers.
Twist just the middle of each section around the tong; a few inches away from the roots and the ends.
Let the hair cool, then pull the sections appart. You can now add sea salt spray and scrunch the waves a little bit for a more natural look.
I curled one side of my model's head in 4 sections, as she has very thick hair. I held each section for about 8 seconds around the curling tongs.
Then using my fingers I broke the curls apart so that you can't see the four sections of curls. At the end I added some sea salt spray for more texture.

Hair before styling

Hair after styling
Hair drying with a diffuser
Start by preping the hair with sea salt spray and mousse. A diffuser is a great product to use for creating a beach hairtyle. You sit the hair in and the air goes through the holes and the bits that stick out help with the shape of the look and the way hair dryes. When using this technique it is best to start with freshly washed hair, but you can also wet the hair down. Make sure the hair is semi-dry (use a towel) as it will speed up the drying process. If your model's hair is damaged don't set the hairdryer on full heat.
Place the hair into the diffuser and start placing section by section onto it and move it around. Ask the model to lean backwards and forwards (not for too long). Scrunch the hair as you are going to help create the textured look.
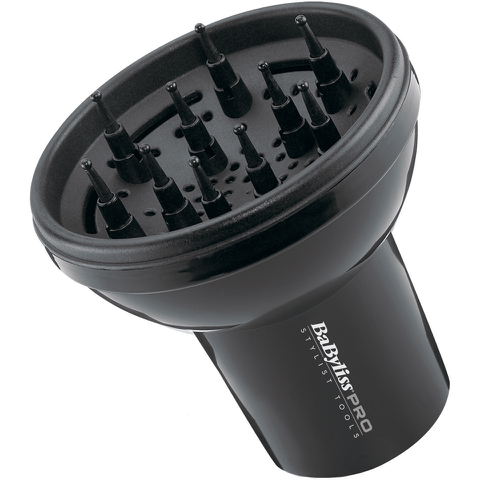
BaByliss Pro Diffuser
(source: http://www.lookfantastic.com/babyliss-pro-diffuser/
Accessed: Feb 24 2016)
I dryed the hair the way I described above. Since my model's hair is naturally wavy and the diffuser really enhanced the waves and have her very nice texture.

Drying the hair with the diffuser

Final look

Final look

Final look

Final look
The only thing I didn't like about the final look is how frizzy the hair was, this probably wouldn't happen if I washed her hair beforehand.
Also, it was hard to brush the hair out, but the reason for that is probably because the ends of her hair are quite damaged and dry and the sea salt spray made them even more dry.
Twists
This is the third way of creating a beach look is by twisting the hair and using the straightener. Again, the size of the sections depends on the model's hair, however, to aviod the 'dreaded' look use bigger sections. You can use styling products before using heat, or after, but make sure you use a heat protecting spray.
Take a section and devide it into two. Then twist each section individually (each in the opposite direction), and then twist them together. Make sure the straightener is very hot and press onto the hair and gently work your way down. You don't have to hold it for too long.
I used this technique after I've dryed her hair with the diffuser so I already had some sea salt spray in it. I only twisted the top layer of her hair and I think that this is a good finishing touch do to as the hair doesn't look as frizzy anymore and the twists add more definiton and texture to the look.

Two twists

two twists twisted together

Final look

Final look

Final look

Final look
Model: Rachel Stonock
(created on: Feb 24 2016)
Chignon
As Rachel, my model, had to do some braiding I decided to do this final look on George as his hair is naturally wavy.
I sprayed his hair with sea salt spray then tied a low ponytail at the back, leaving some hair at the front. Then I twisted the ponytail into a barrel curl and pinned it with some curby grips. It was slightly uneven, but that is supposed to look slightly messy and effortless. Then I braided the two sections that framed George's face and wrapped them around the chignon.

Ponytail

Ponytail

Ponytail twisted into a chignon

Final look

Final look

Final look

Final look
Model: George Moore
(created on: Feb 24 2016)
Beach hair is my go-to hairstyle all year round. Since I grew up so closely to the sea, my hair is always full of salt during the summer and I love how wavy and textured it looks. Another technique that I use sometimes to create this look when it is not summertime is by braiding my hair into braids (I usually do about 6 or 7) and then I run my straightener through them and add sea salt spray for texture and dry shampoo for texture.
I have never used a diffuser before and, honestly, I thought that it spins and was scared that the hair can get caught in it but now when I know how it works I definitelly need it because it creates such a lovely natural wave to the hair and a lot of volume - which I love.
The twisting and curling techniques are also very simple and effective if you want to add volume in just a couple of minutes. However, I don't like having straight ends when curling the hair and I always twist the ends too but keep them around the barrel for 3 seconds, otherwise it looks kind of fake and unnatural.
Nema komentara:
Objavi komentar